 Citenook1
Blog · Guides
How to use NotebookLM (now Gemini Notebook), step by step
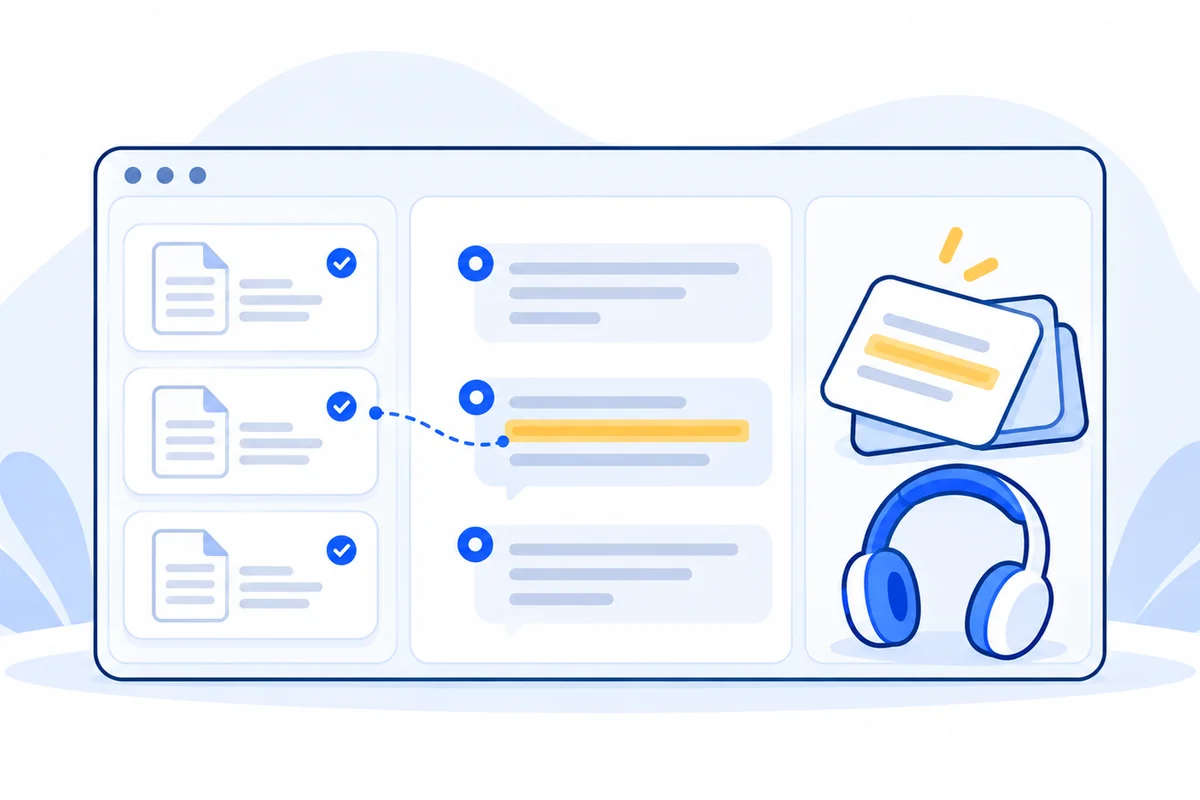
To use NotebookLM (now called Gemini Notebook), go to notebook.google.com, create a notebook, and add your sources: PDFs, Google Docs, websites, YouTube videos or pasted text. Then ask questions in the chat and check the numbered citations under each answer. Use the Studio panel to turn the same sources into flashcards, quizzes, mind maps, slide decks or a podcast-style Audio Overview.
This guide walks through each step with screenshots from a real test on 15 October 2026, using made-up project files. Google's help pages were checked the same day. If you first want to know what the tool is, read what NotebookLM is and how it works.
Before you start
- An account: a personal Google account works. Work and school accounts need their admin to turn it on.
- A browser or the phone app: it runs in any browser on a computer, and there are apps for iPhone, iPad and Android. There's no Mac or Windows app; see is there a NotebookLM app for Mac.
- The free plan is enough to start: 100 notebooks with up to 50 sources each. Paid Google AI plans raise this (Pro allows 300 sources per notebook). Details in is NotebookLM free.
Step 1: Create a notebook
Open notebook.google.com and choose Create new notebook. In our test, opening the site went straight into a new, untitled notebook. Make one notebook per project, class or topic. Each notebook is separate, and it can't see the sources in your other notebooks.
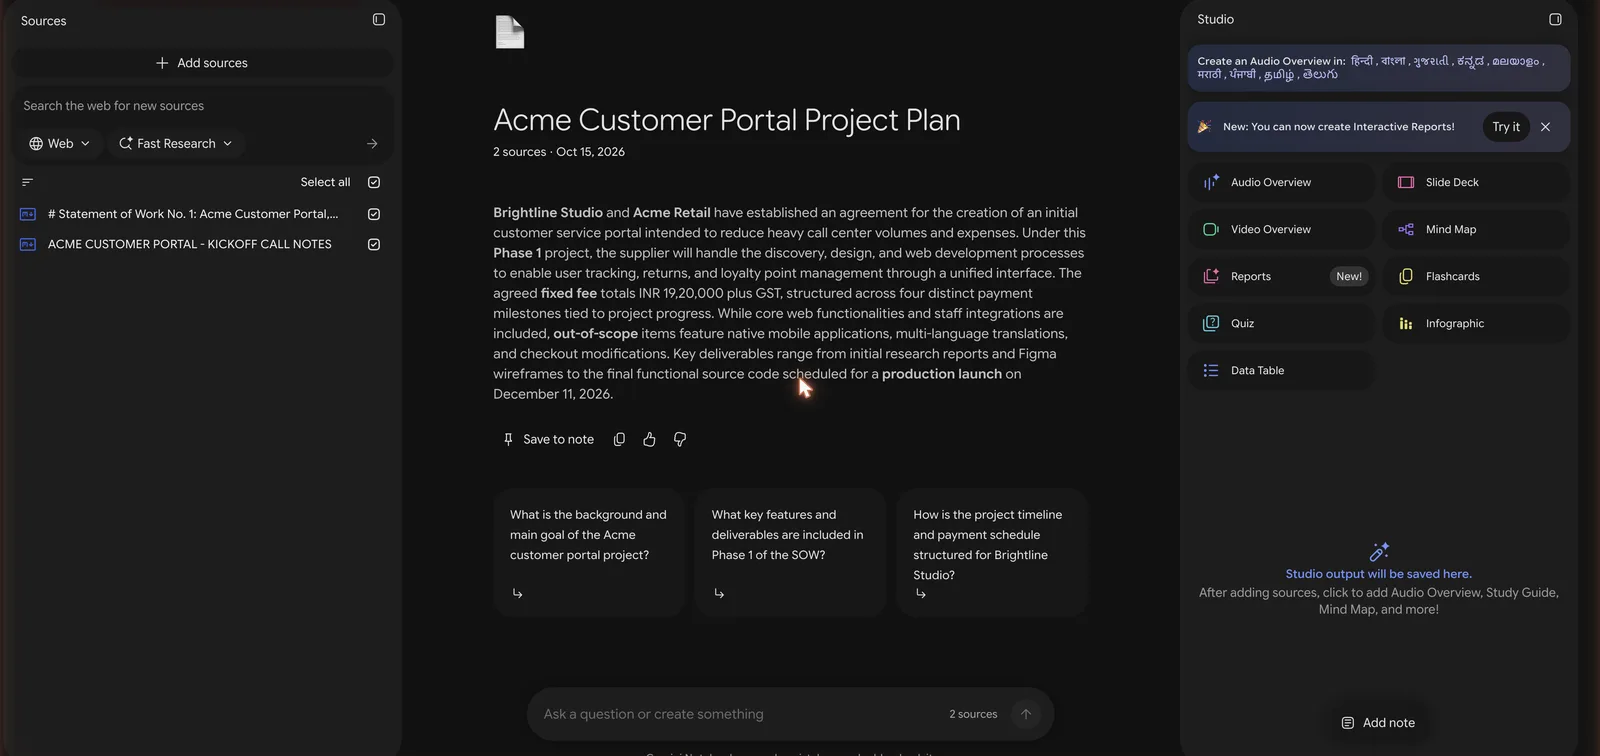
A notebook has three panels:
- Sources on the left: your files and links. Tick or untick each one.
- Chat in the middle: a summary of your sources, suggested questions, and the box where you ask your own.
- Studio on the right: tools that make things from your sources, like Audio Overviews, flashcards and slide decks.
Step 2: Add your sources
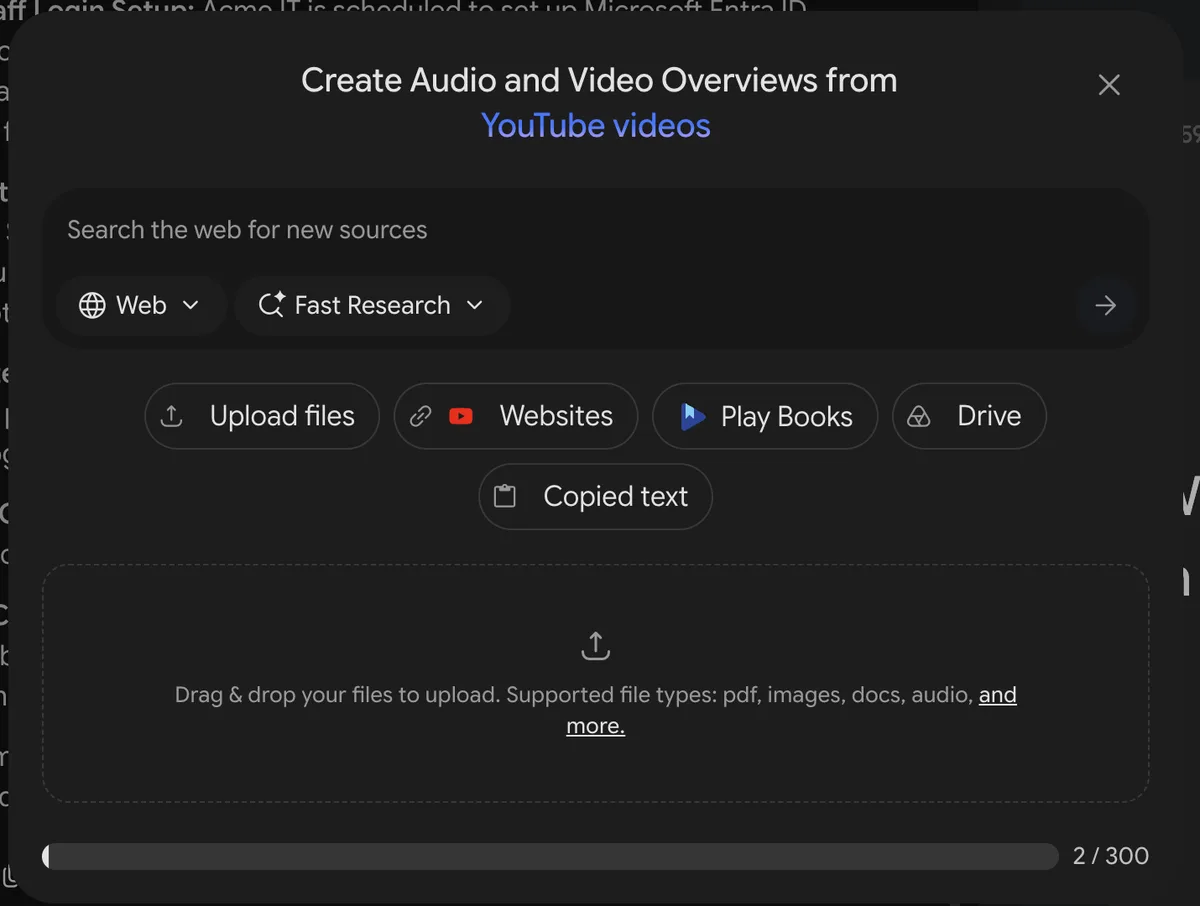
Choose Add sources. You can upload files, add Google Drive files, paste web or YouTube links, or paste text. You can also type a topic into the search box and let Fast Research find web or Drive sources for you.
What it can read:
- Files: PDF, Word, PowerPoint, text, Markdown, CSV, ePub, images and audio.
- Google files: Docs, Slides (up to 100 slides) and Sheets. Drive files stay in sync every few minutes; everything else is a copy from when you added it.
- Links: web pages (text only, no paywalled pages) and public YouTube videos with captions (it reads the transcript).
- Size: each source can be up to 500,000 words or 200 MB.
If your project has more files than the limit, see how to work past the source limit.
Step 3: Ask questions and check the citations
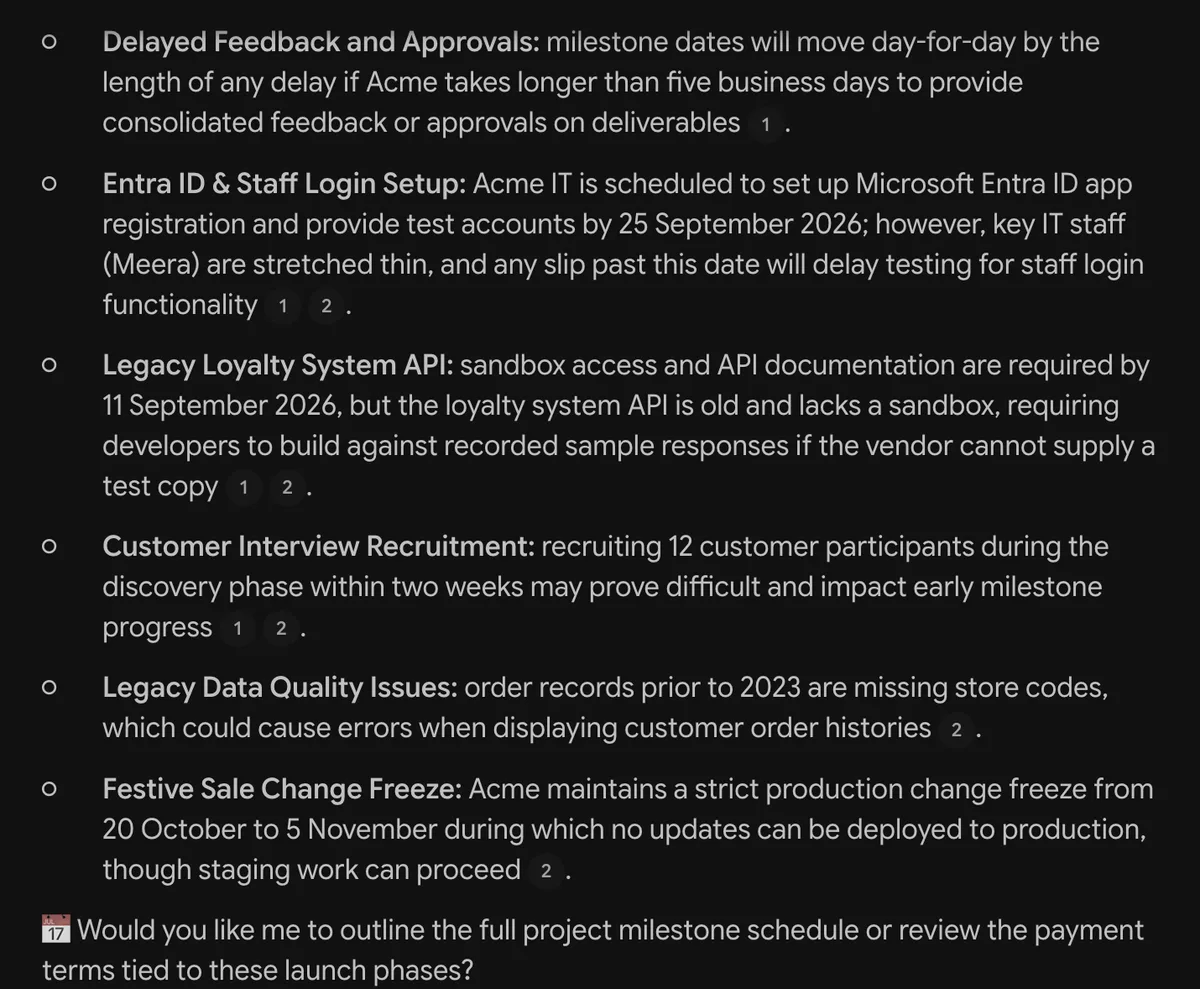
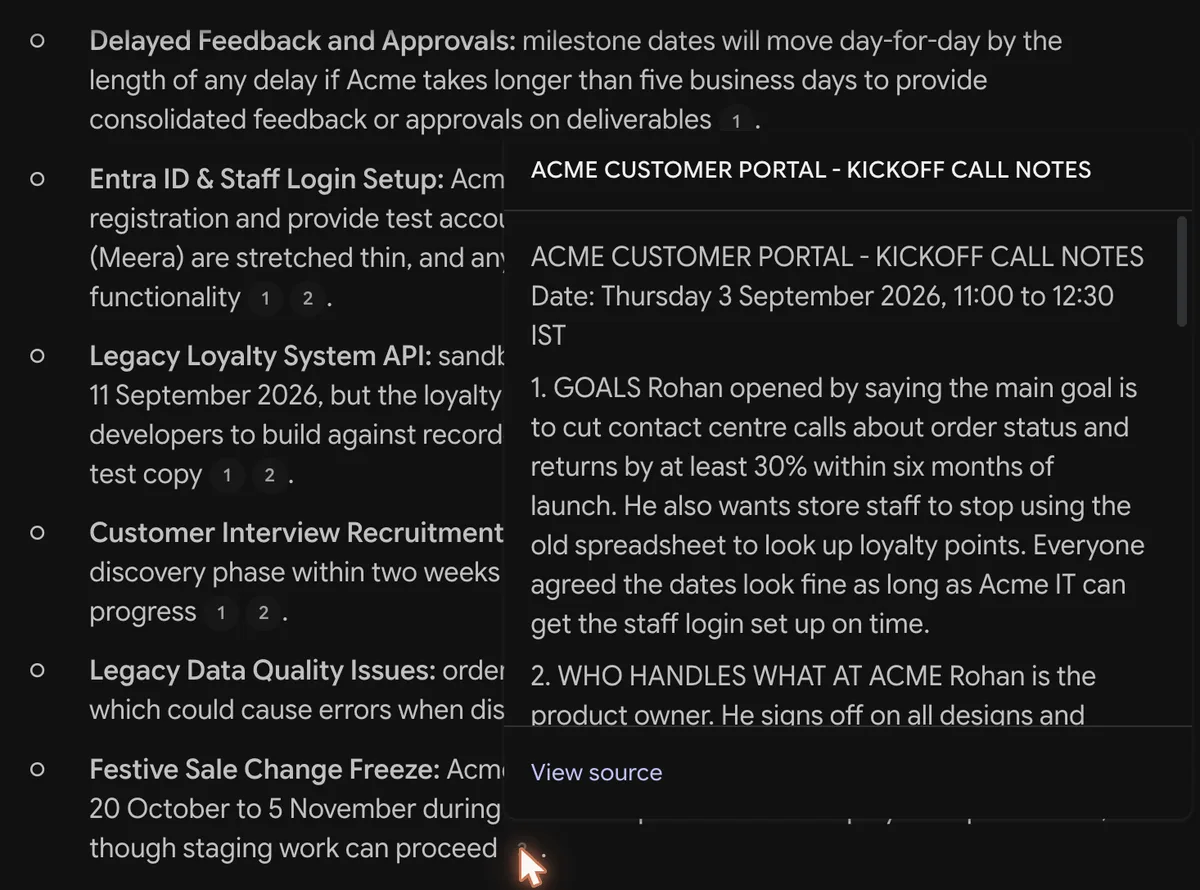
Type a question in plain words. Every claim in the answer gets a small number. Hover over a number to see the passage it came from, or select it to open the source.
We asked: "When is the production launch, and what could delay it?" It gave the right date and six risks from our two files, each with a citation. All six were really in the files.
Check the citations on anything that matters. In our test with pasted text, hovering a citation showed the top of the meeting notes, not the cited line, so we still had to read to find it:
Two more controls worth knowing:
- Pick the sources: untick a source to leave it out of the next answer. Handy when two files disagree.
- Configure Chat: in the Chat panel, choose a style (Default, Learning Guide for studying, or Custom, where you describe a role like "explain it like a tutor") and a response length.
Step 4: Save what's useful as notes
Select Save to note under any answer to keep it, with its citations. You can also write your own notes. Two features people miss:
- Convert to source: turn a note, or all notes at once, into a source, so later answers and Studio tools use it.
- Export to Docs: send a note to Google Docs. Edits there don't sync back.
Step 5: Make things in the Studio panel
Each Studio tool works from the sources you've ticked. Select a tool to use the defaults, or the pencil icon to change its settings first. They run in the background, so you can keep chatting.
| Tool | What you get | Settings you can change |
|---|---|---|
| Audio Overview | A podcast-style talk about your sources | Format (Deep Dive, The Brief, The Critique, The Debate), length, language, a focus prompt |
| Video Overview | A narrated video | Explainer, Short (about 60 seconds) or Cinematic (English only), visual style |
| Mind Map | A branching map of the main topics | Select a branch to ask about it |
| Reports | A written document or an interactive report | Template, focus |
| Flashcards and Quiz | Cards or multiple-choice questions | Number, difficulty, language, topic |
| Slide Deck | Slides you can download as PDF or PowerPoint | Detailed deck or presenter slides, length, prompt |
| Infographic | A one-page image | Detail, orientation, style |
| Data Table | A table pulled from your sources | What to put in it |
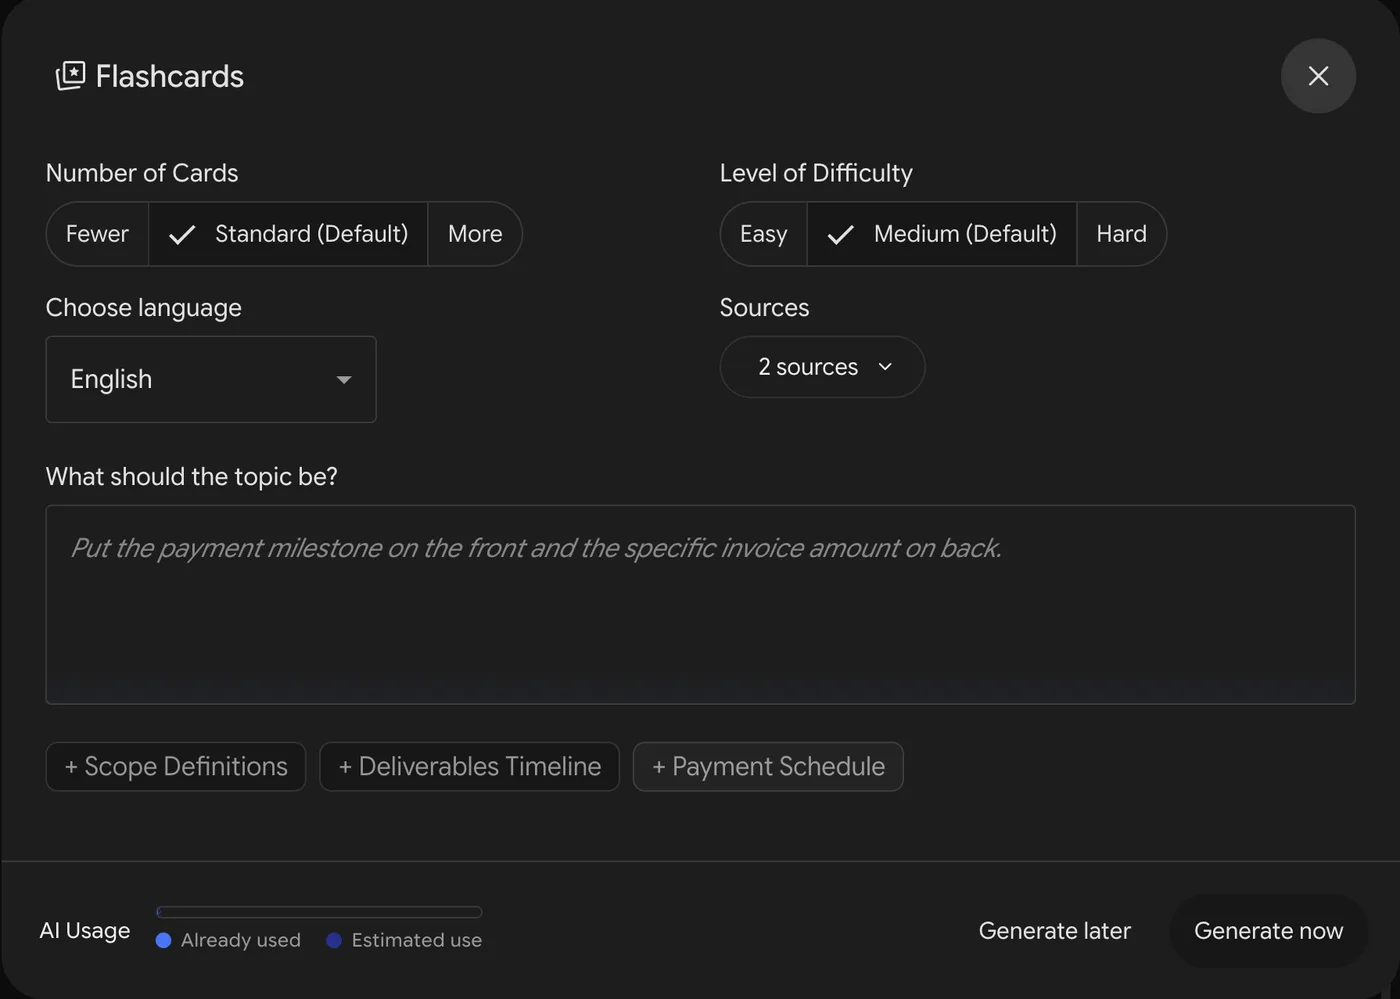
With the default settings, it made 59 flashcards from our two short files in about a minute. Audio and video take longer: Google says a few minutes for audio, and sometimes more than 30 minutes for video. Studio output can contain mistakes, so check anything you'll rely on against the sources.
Step 6: Share or take it with you
Use Share to give others access. A personal account can share a notebook with up to 50 people. You can also share links to single items, like an Audio Overview or a slide deck, and download audio, video, slides and flashcards (as a CSV file). The phone apps let you read and chat, but some features, like editing notes and mind maps, aren't there yet.
How to use NotebookLM to study
- Make one notebook per course or exam, and add the lecture slides, readings and your own notes.
- Set Configure Chat to Learning Guide, so it explains instead of just answering.
- Ask it to explain the hardest topic, then follow the citations back to the reading.
- Make flashcards on that topic. Mark each card "Got it" or "Missed it", then retake only the ones you missed.
- Take a quiz the day before the exam, and listen to an Audio Overview on the way.
How to use it for work
- Before a meeting: add the project documents and past notes, and ask "what's still open, and who owns it?"
- Long reports: ask for the three main findings, then check each citation.
- Contracts and policies: ask about dates, notice periods and fees. Keep the actual decision with a person, and read the clause yourself.
- Sharing knowledge: build a notebook of team documents and share it, so others can ask it questions.
Tips to use it well
- Ask specific questions. "What are the payment dates in the statement of work?" works better than "summarize everything".
- Keep notebooks small and on one topic. Unrelated files make answers vaguer.
- Use the suggested topics. Studio tools offer topic ideas from your sources, which is a quick way to focus a quiz or slide deck.
- Save good answers as notes, then convert them to sources, so the notebook gets better as you go.
- Watch your usage. On 15 October 2026 the app showed a notice that usage limits now refresh every 5 hours instead of every 24, and that one flexible allowance per notebook replaces the separate limit for each tool. Check Settings, then Usage, for your numbers.
If your files are confidential
Everything you add to Gemini Notebook is uploaded to Google and stored with your notebook. Google says personal accounts' content isn't used to train its models unless you send feedback. Even so, many people can't upload client contracts, patient notes or tax papers to a cloud service, and it doesn't work offline (see can you use NotebookLM offline).
Citenook is a Mac app for those files. It reads your folders, PDFs, Apple Notes and Obsidian vault on your Mac, answers with a model on your Mac, and links each answer to the exact sentence it came from, with nothing uploaded. It handles whole folders (1,000 files on the starting plan, no limit on higher plans), but it doesn't make Audio Overviews, flashcards or slide decks, and models on a Mac are simpler than Google's. It needs an Apple silicon Mac with macOS 15 or later, is free for 30 days, then from $9.99 a month. See Citenook vs Gemini Notebook.
Questions
How do I use NotebookLM for the first time?
Go to notebook.google.com, sign in with a Google account, create a notebook, add a few sources, and ask a question in the chat. Then try one Studio tool, like flashcards or an Audio Overview.
Is NotebookLM free to use?
Yes. The free plan gives you 100 notebooks with up to 50 sources each, with usage limits. Google AI Plus, Pro and Ultra raise the limits.
How do I use NotebookLM to study?
Add your course material to one notebook, set Configure Chat to Learning Guide, ask about the hard parts, then make flashcards and a quiz. Retake only the cards you missed.
Can NotebookLM use more than one notebook at a time?
No. Each notebook only sees its own sources, so put everything for one project in the same notebook.
Is NotebookLM now called Gemini Notebook?
Yes. Google renamed it on 16 July 2026. The steps are the same, and old notebooklm.google.com links redirect to notebook.google.com.
Does NotebookLM work without the internet?
No. It runs in Google's cloud. Only Audio Overviews downloaded in the phone app play offline.
Sources, checked 15 October 2026: Google's help pages on creating a notebook, adding sources, chat, notes, Audio Overviews, Video Overviews, Mind Maps, flashcards and quizzes, reports, slide decks, infographics, plans and usage limits, plus our own test in a Google AI Pro account with made-up files.